hdmi port stopped working on dell laptop

Title: 2023 NEW How to Fix HDMI Not Working on Laptop Windows
Channel: Wondershare Recoverit Data Recovery
2023 NEW How to Fix HDMI Not Working on Laptop Windows by Wondershare Recoverit Data Recovery
hdmi port not working on dell laptop, hdmi output not working on dell laptop, hdmi port not working dell inspiron 15, dell hdmi port not working, how do i enable my hdmi port on my dell laptop, dell hdmi port not working windows 10, hdmi port not working on laptop after update
DELL Laptop HDMI Nightmare? FIX It NOW!
HDMI Headaches on Your Dell Laptop? Breathe Easy, We've Got You!
Okay, so your Dell laptop is refusing to play nice with your HDMI cable? Been there, felt that frustration. It's a common issue, surprisingly. It can be a real buzzkill when you're trying to watch a movie on a bigger screen or give that crucial presentation. Before you chuck your laptop across the room, though, take a deep breath. We're going to navigate this together. We'll explore some solutions that might just save the day.
The Blame Game: What's Really Going On?
First things first: let's consider the usual suspects. Is the HDMI cable itself the culprit? Sometimes a faulty or damaged cable is the root cause. Moreover, your external display could be at fault. Have you tried a different cable or a different device, like a Blu-ray player? Also, check the obvious: is everything plugged in securely? It sounds simple, I know. But it's a frequent issue. Therefore that should be checked immediately.
Driver Dilemmas and Digital Disasters
Drivers are the silent workforce behind your laptop's functions. And when they go rogue, chaos often ensues. Your graphics drivers, in particular, handle the HDMI output. So, an outdated or corrupted driver could be the source of your woes. To resolve this, you should head to Dell's website. Search for your specific laptop model. Download the latest graphics driver for your operating system. Then, install it.
Here’s a quick tip: Before installing the new driver, it’s often wise to uninstall the old one. Moreover, you can usually do this through Device Manager. This is a safe way to ensure a clean installation. In addition, a driver conflict is possible. Then, restart your laptop. Then, reconnect your HDMI cable.
Resolution Revelation: Is Your Screen Setting the Scene?
Sometimes, the problem isn’t hardware or software. It’s simply a settings mismatch. Your laptop might be trying to output a resolution that your external display doesn't support. Or, it’s possible that your external monitor may not be set to the correct input.
To fix this, right-click on your desktop. Then, select "Display settings." Scroll down to "Multiple displays." Choose your external screen from the dropdown. Then, tinker with the "Advanced display settings" option. Experiment with different resolutions and refresh rates. Thus, you can get the HDMI connection working. Restarting your computer at the end is advisable.
Power Play: The Importance of Proper Configuration
Another common concern involves power settings. Your laptop might be conserving power. Therefore, it might not fully engage the HDMI port. Access your power plan settings. You should navigate to the control panel. Choose “Power Options.” Make sure your current power plan is set to "Balanced" or "High performance." Specifically, be sure to check the settings for "Plugged in." This ensures maximum performance when you're connected to power.
Troubleshooting Tactics: A Step-by-Step Guide
The Cable Check: First of all, swap out your HDMI cable with a known working one. Test the other devices with the same cable.
The Display Test: Try connecting your Dell laptop to a different monitor or TV.
The Restart Ritual: Restart your laptop. Sometimes, a simple reboot is all it takes.
The Device Manager Dance: Open Device Manager (search for it in the Windows search bar). Expand "Display adapters." Right-click on your graphics card and select "Update driver." Choose "Search automatically for drivers."
The BIOS Buzz: Make sure your BIOS is up-to-date. You can find instructions on Dell's website.
Beyond the Basics: Advanced Adventures
If you've tried everything above and still no luck, consider these more advanced approaches. Some Dell laptops have specific HDMI settings you can adjust in the BIOS. Check your laptop's manual. Also, there may be issues with the Windows update. Then, consider rolling back to a previous version. Finally, a hardware problem is possible. So, consider contacting Dell support.
Finally, Peace of Mind and Pixel-Perfect Playback
Dealing with HDMI problems can be infuriating. But, you’ve got this. By systematically going through these steps, you should be able to diagnose and fix the issue. So that you can get back to your enjoyment. Enjoy those movies, presentations, and games. And, remember, if all else fails, Dell's support team is there to help. Good luck, and happy viewing!
HP Laptop Mounts: The Ultimate Guide to Effortless Setup!DELL Laptop HDMI Nightmare? FIX It NOW!
Let's be honest, we've all been there. You’re ready to settle in for a movie marathon, fire up a presentation, or maybe just share some photos with the family, and then… black screen. Or worse, flickering images, distorted colors, the dreaded "no signal" message. Your Dell laptop's HDMI port is suddenly a brick wall, and your carefully laid plans are crumbling faster than a poorly built house of cards. This is the Dell laptop HDMI nightmare, and trust me, we've all wrestled with it. But fear not, because we're here to help you navigate this technological labyrinth and get that screen working like a charm.
1. The HDMI Headaches: Why Is My Dell Laptop HDMI Not Working?
Before we start throwing solutions at the problem, let's understand the "why" because, you know, knowledge is power! The HDMI issue isn't a single, isolated problem. It’s more like a tangled web of potential culprits. It could be a simple quick fix or require a bit more digging. Here are some of the usual suspects:
- Hardware Hiccups: A loose HDMI cable, a faulty port on your laptop or TV/monitor, or even an internal hardware problem with your Dell's graphics card. Think of it like a broken pipe; the connections just aren't flowing correctly.
- Software Snafus: Outdated drivers, operating system glitches, or incompatible software configurations. This is like having the wrong app installed on your phone; it just won't play nice with the other components.
- Resolution Roulette: The resolution settings on your laptop might not be compatible with your external display. It's like trying to fit a square peg into a round hole.
- Power Power Plays: Insufficient power supply to your laptop or the external display.
2. Cable Capers: Checking Your HDMI Connection
Okay, first things first, let's start with the basics. The most common culprit is often the simplest to fix. Let's check the cable!
- Inspect the Cable: Is the HDMI cable securely plugged into both your Dell laptop and your monitor/TV? Wiggle it gently. Does it feel loose? If so, unplug and carefully plug it back in, ensuring a snug fit.
- Try a Different Cable: Sometimes, the cable itself is the problem. Do you have another HDMI cable you can try? This quick swap-out can instantly diagnose a faulty cable. Think of it as rule number one for troubleshooting: rule out the obvious!
- Test on Another Device: Try connecting your laptop to a different monitor or television. This will help you determine if the issue lies with your laptop or the display device. If it works on another display device, then it's likely the issue lies with the original screen.
3. Driver Doctor: Updating Your Graphics Drivers
Outdated or corrupted graphics drivers are a common reason for HDMI woes. Think of drivers like translators between your laptop and the monitor. If the translation is off, you get a garbled message. Here’s how to update them:
- Automatically: The easiest way is often through Windows Update. Go to Settings > Update & Security > Windows Update, and check for updates. Windows usually handles driver updates automatically.
- Manually (Recommended): Go to the Dell website, find the support section for your specific laptop model, and download the latest graphics drivers (usually Intel, NVIDIA, or AMD, depending on your setup). Install them.
- Device Manager: You can also update drivers through Device Manager (search for it in the Windows search bar). Right-click on your graphics adapter under "Display adapters" and select "Update driver."
4. Resolution Rescue: Adjusting Your Display Settings
Sometimes the resolution settings on your laptop are just…off. They might be incompatible with your external display. Here’s how to fix it:
- Right-click on the Desktop: Select "Display settings."
- Identify Your Second Display: Under the "Multiple displays" section, you should see your external monitor.
- Adjust the Resolution: Click on the second display and experiment with the resolution settings until you find one that works. Start with the "Recommended" setting. See if that does the trick.
- Duplicate or Extend: Make sure your display mode is set correctly. "Duplicate" mirrors your laptop's display. "Extend" allows you to use the external monitor as a second screen. Try both to see which works best for your needs.
5. Power Play: Ensuring Adequate Power Supply
Is your laptop plugged into a reliable power source? A weak battery can sometimes affect HDMI output. Make sure your laptop is fully charged, or better yet, connected to the power adapter while connected to the external display.
6. Refresh Rate Revelations: Adjusting the Refresh Rate
The refresh rate refers to how many times per second a display updates the image. An unsupported refresh rate can cause display issues. Here is how to do it:
- Display Settings: Right-click on the desktop and select "Display settings."
- Advanced Display Settings: Click on your second display, then select "Advanced display settings."
- Adjust Refresh Rate: In the "Choose a refresh rate" dropdown, select a lower or different refresh rate. Start with the "Recommended" setting and gradually adjust.
7. The Great Restart: A Simple Solution
It’s almost cliché, but restarting your laptop and the external display can sometimes work wonders. This simple step often clears up temporary glitches. Think of it as a digital reset button.
8. BIOS Basics: Check BIOS Settings (Advanced)
For more advanced users, BIOS settings may have an impact.
- Enter BIOS: Restart your laptop and press the appropriate key repeatedly (often F2, F12, or Del) to enter the BIOS setup.
- Check Display Settings: Look for any display settings that might be interfering with HDMI output.
- Consult Dell Support: If you're unsure about the BIOS settings, consult Dell's documentation or support for advice.
9. The Sound of Silence: Checking Audio Output
Sometimes, the video works, but the audio doesn't. Here's how to fix that:
- Sound Settings: Right-click on the speaker icon in the system tray and select "Open Sound settings."
- Choose Output Device: Under "Output," make sure your external display is selected as the output device.
- Troubleshoot Sounds: Run the built-in troubleshooter for sound issues.
10. Windows Updates: Keeping Everything Current
Keeping your Windows operating system up-to-date is essential for stability and compatibility.
- Check for Updates: Go to Settings > Update & Security > Windows Update and install any available updates.
- Driver Updates Included: Windows updates often include driver updates, contributing to a smoother HDMI experience.
11. Uninstall and Reinstall: Driver Reinstallation
If driver updates haven't worked, try uninstalling and reinstalling the graphics drivers:
- Device Manager: Open Device Manager (search for it in the Windows search bar).
- Uninstall Driver: Expand "Display adapters," right-click on your graphics adapter, and select "Uninstall device."
- Restart: Restart your laptop, and Windows should automatically reinstall the drivers, or you can manually install the latest drivers.
12. Malware Mayhem: Scan for Malware
Malware can sometimes interfere with system resources and cause display problems.
- Run a Scan: Run a full scan with your antivirus software to check for infections.
- Remove Threats: Remove any detected malware.
13. External Display Issues: Examine Your Display
It's not always your Dell Laptop, the problem could lie with your external monitor or TV.
- Check Power: Make sure the display is turned on and plugged in.
- Input Selection: Verify that the display is set to the correct HDMI input.
- Test with Another Device: See if the display works with another device.
14. The Factory Reset Option: Last Resort
If all else fails, and you're comfortable with the data loss, you can try a factory reset:
- Backup Your Data: Back up all your important files, as a factory reset will erase everything.
- Reset This PC: Go to Settings > Update & Security > Recovery and select "Reset this PC."
- Follow the Instructions: Follow the on-screen instructions, choosing to keep or remove your files.
15. When to Call for Help: Professional Assistance
If you’ve tried all these steps and still no luck, it's time to consider professional help:
- Dell Support: Contact Dell's technical support for further assistance.
- Local Computer Repair Shop: Take your laptop to a reputable computer repair shop. The issue might be hardware-related and require specialized skills.
Wrapping It Up: Your Dell HDMI Victory!
So there you have it! We've covered a plethora of troubleshooting steps to conquer your Dell laptop HDMI nightmare. Remember, it’s a process of elimination. Start with the simple fixes like the cable and gradually work your way through the more complex solutions like driver updates and system resets. Don’t be discouraged if the first solution doesn't work. This is like being a detective following clues! With our guide, you'll be back to enjoying your
Work From Home Laptop: The ONE That'll Actually Boost Your Productivity!How To Fix Dell Laptop HDMI Port Not Working Windows 11
By Geo Statology How To Fix Dell Laptop HDMI Port Not Working Windows 11 by Geo Statology
Dell computer PC HDMI port not working repair Karna sikhe free details me
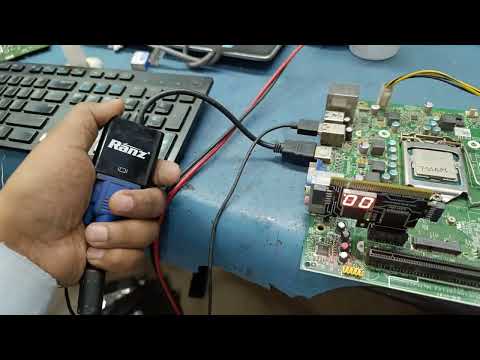
By TRC TECH Dell computer PC HDMI port not working repair Karna sikhe free details me by TRC TECH
How to Fix HDMI Not Working on Laptop Windows 11

By Ground Zero How to Fix HDMI Not Working on Laptop Windows 11 by Ground Zero

Title: How to Fix HDMI Not Working on Laptop Windows 10
Channel: Systweak Software
How to Fix HDMI Not Working on Laptop Windows 10 by Systweak Software
Wifi On Laptop Phone
DELL Laptop HDMI Nightmare? FIX It NOW!
We understand. The frustration. You've invested in a powerful DELL laptop, expecting seamless connectivity and vibrant visuals on your external display. Instead, you're confronted with a flickering screen, a distorted image, or, worst of all, complete silence and nothing on the connected monitor. The HDMI handshake, a supposed standard for digital video and audio transmission, is proving to be anything but. But before you resign yourself to a life of frustration with a small screen, let us assure you: you are not alone, and solutions abound. We'll guide you through the most common culprits behind your DELL laptop's HDMI woes and provide actionable, step-by-step solutions guaranteed to banish those connection headaches.
Decoding the DELL HDMI Dilemma: Unveiling the Root Causes
Before diving into solutions, understanding the potential sources of the problem is crucial. The HDMI connection, while technically straightforward, relies on several interconnected elements. A breakdown in any one of these can lead to the dreaded black screen or distorted imagery.
1. Cable Conundrums: The HDMI Cable's Role
The unassuming HDMI cable is often the primary suspect. While seemingly simple, these cables are susceptible to wear and tear, manufacturing defects, and even incompatibility with certain display technologies.
Physical Damage: Check the cable meticulously. Look for bends, kinks, or exposed wires. Even subtle damage can disrupt the signal. Try gently wiggling the connectors at both ends while the laptop and display are powered on. If the image flickers or appears, the cable is likely compromised and requires immediate replacement.
Version Variations: HDMI cables come in different versions (1.4, 2.0, 2.1, etc.). While backward compatible, older versions might not support the resolutions, refresh rates, and features offered by your laptop and external display. Ensure your cable is rated to handle the specifications of both devices. Using a high-speed HDMI cable is always recommended.
Length Matters: Long HDMI cables can experience signal degradation, particularly at higher resolutions. For longer runs, consider using a high-quality, shielded cable or employing an HDMI extender.
2. Driver Debacles: The Software Side of the Equation
Outdated, corrupted, or incompatible drivers can wreak havoc on your laptop's ability to communicate with your external display. These drivers govern the interaction between your laptop's graphics card and the display, making them critical for proper image and audio transmission.
Graphics Card Drivers: This is the primary area to focus on. Visit the NVIDIA, AMD, or Intel website, depending on your laptop's graphics card, and download the latest drivers specifically designed for your laptop model and operating system. Consider installing the drivers in a clean installation by first uninstalling the existing ones.
Display Drivers: Sometimes, the external display itself requires a driver, particularly for advanced features or compatibility with specific technologies. Consult the display manufacturer's website.
Driver Conflicts: Occasionally, drivers can conflict with each other or with other software on your system. If you suspect a conflict, try uninstalling recently installed programs or performing a system restore to a point before the HDMI issue began.
3. Display Disagreements: Examining the External Monitor
The external display itself plays a vital role. Its settings, capabilities, and compatibility with your laptop are critical factors.
Input Selection: Ensure your display is set to the correct HDMI input. Use the display's on-screen menu to choose the appropriate HDMI port. This is often the most overlooked, yet simplest, solution.
Resolution and Refresh Rate: Incorrect display settings can cause issues. Access your display settings in Windows (right-click on your desktop, select "Display Settings") and ensure the resolution and refresh rate are compatible with both your laptop and the external display. Experiment with different settings to find the optimal configuration.
HDCP Compliance: High-bandwidth Digital Content Protection (HDCP) is a copy protection system. If you're trying to watch copyrighted content (like a Blu-ray movie or streaming video), your display and laptop must support HDCP. Check the specifications of both devices to ensure compatibility. If there's an HDCP issue, consider using a different source (e.g., a different streaming platform).
4. The Power Play: Ensuring Adequate Power Delivery
While often overlooked, power can influence these connections.
Laptop Power Adapter: Is your laptop plugged in and receiving sufficient power? Some laptops may limit performance or connectivity when running on battery power. A weak power supply can sometimes cause display problems.
External Display Power: Make sure the external display is properly powered on and receiving power.
5. Port Problems: Inspecting the HDMI Port Itself
The physical HDMI port on your laptop is another potential point of failure.
Debris and Dust: Inspect the port for any debris or dust that might be interfering with the connection. Use a can of compressed air to gently clean the port.
Physical Damage: Look for bent pins or other physical damage within the HDMI port on your laptop. If the port is damaged, you may need to have it repaired by a qualified technician.
Step-by-Step Solutions: Conquering the HDMI Challenge
Now, let's move beyond diagnosis and onto the solutions. We'll take a systematic approach, addressing each potential cause.
Step 1: Cable Conundrums, Revisited
Try a Different Cable: This is the simplest test. Swapping the HDMI cable is often the quickest fix. If the new cable works, you've identified the culprit.
Test the Cable with Another Device: Connect the cable to a different device (e.g., a game console, Blu-ray player) and see if it transmits the signal properly to the external display. This further isolates the problem.
Step 2: Driver Diagnostics and Updates
Update Graphics Drivers:
- Right-click on the Windows Start button and select "Device Manager."
- Expand "Display adapters."
- Right-click on your graphics card (e.g., NVIDIA GeForce RTX 3070, Intel Iris Xe Graphics) and select "Update driver."
- Choose "Search automatically for drivers" to let Windows find the latest drivers. If that fails, go to your manufacture website to download the latest drivers.
- If the problem persists, manually download and install the latest drivers directly from the manufacturer's website (NVIDIA, AMD, or Intel).
Roll Back Driver: If updating the driver causes a problem, you can roll back to an older version. In Device Manager, right-click on the graphics card, select "Properties," then go to the "Driver" tab and click "Roll Back Driver" (if available).
Reinstall Drivers: If all else fails, completely uninstall the existing graphics drivers using the Display Driver Uninstaller (DDU) program (available online, but use with caution as it involves accessing low-level system components). Then, reinstall the latest drivers from the manufacturer's website.
Step 3: Display Settings Optimization
Duplicate, Extend, or Second Screen Only: In Windows Display Settings, choose the appropriate display mode.
- Duplicate: Both screens show the same image.
- Extend: The external display acts as an extension of your desktop.
- Second Screen Only: Uses only the external display.
Adjust Resolution and Refresh Rate: Make sure the resolution and refresh rate of the external display is supported by your laptop. Experiment with different settings to find the optimal configuration.
Identify Displays: Right-click on the desktop and select "Display settings". Then, click the "Identify" button to see which number your external display has to ensure that you are adjusting its settings.
Step 4: Power Play Considerations
Plug in Your Laptop: Ensure your laptop is connected to its power adapter.
Test with a Different Power Outlet: Sometimes, a faulty power outlet can cause issues.
Step 5: Advanced Troubleshooting and Considerations
BIOS Updates: Ensure your laptop's BIOS (Basic Input/Output System) is up to date. BIOS updates can sometimes resolve compatibility issues. Check the DELL support website for the latest BIOS for your laptop model.
External Docking Stations: Are you using an external docking station? Sometimes, these can create problems. Try connecting the external display directly to your laptop to see if the docking station is the issue.
HDMI to DisplayPort Adapters: If your display or laptop has a DisplayPort connection, consider using an HDMI to DisplayPort adapter. This can sometimes provide a more reliable connection.
System Restore: If the problem started recently, try performing a system restore to a point before the issue began. This can undo any recent changes that might be causing the problem.
Contact DELL Support: If you've exhausted all other options, contacting DELL support for assistance is the logical next step. They may be able to provide specific troubleshooting steps related to your laptop model.
Prevention is Key: Maintaining a Smooth Connection
Once you've resolved the HDMI issue, take steps to prevent it from recurring.
- Regular Driver Updates: Keep your graphics drivers and BIOS up to date.
- Cable Care: Treat your HDMI cable with care. Avoid bending or kinking it.
