keyboard on a laptop not working cant turn off

Title: How to shut down laptop with keyboard windows 11
Channel: IT Magics
How to shut down laptop with keyboard windows 11 by IT Magics
Laptop Keyboard DEAD! Emergency Fix (NOW!)
My Laptop Keyboard Just Died! (Panic Mode: Activated!)
The screen glared, a mocking testament. It reflected my frustrated face. My thoughts raced. What now? My trusty laptop's keyboard had just gone kaput. It was a digital disaster! The blinking cursor taunted me. I needed to act fast. My livelihood depended on it. So, I took a deep breath. This was not the time to panic. But I had to fix it. It was an emergency. Let's get this show on the road.
The Dreaded Silence: Identifying the Culprit
First, I needed to diagnose the problem. Was it a hardware failure? Or perhaps, a software glitch? I slowly began my investigation. I pushed the power button. Then, the login screen lit up. I tentatively tapped the keys. Nothing. Not even a flicker. That silence was deafening. And yet, the power button seemed to work. Weird. I then restarted the machine. Again, no dice. This indicated a hardware problem. But maybe, just maybe, it was a driver issue. Thus, I needed more information.
First Aid for Your Keystroke Crisis: Initial Troubleshooting
Immediately, a systematic approach was essential. I had to act quickly. Before anything else, I glanced at the keyboard. Were there any visible issues? No crumbs or sticky substances. That was a solid start. It meant the problem was likely internal. Then, I tried a simple reboot. This is often the first line of defense. It’s like a digital reset. Unfortunately, it still didn't work. Next, I had to consider external factors. Maybe, I thought, an external keyboard would help.
External Savior: Plugging in a Backup Keyboard
Luckily, I had an external keyboard handy, a blessed lifesaver! I plugged it in via USB. And, the computer recognized it instantly. Hallelujah! This confirmed the internal keyboard was the issue. So, I could still work. At least, temporarily. I could keep my sanity. This was a crucial step. It was like a lifeline. I now knew the laptop itself was fine. But the built-in keyboard was lost. This information was invaluable.
Deeper Dive: Checking Device Manager
I was on a mission to solve this problem. Next, I dove into the Device Manager. I wanted to see what was the status of the keyboard detected by the operating system. I searched for "Device Manager" in the search bar. The screen revealed all the installed hardware. I found the keyboard listed under "Keyboards." Thankfully, there were no error symbols. However, this didn't guarantee it was working. It showed the OS recognized the internal keyboard. Then, I right-clicked the keyboard. I selected "Update driver." The system searched for updated drivers. But it found nothing new. So, I figured that was a dead end.
Software Solutions? Exploring Keyboard Settings
Despite the hardware indications, I always consider software. So, next, I opened the keyboard settings. I explored options like "Filter Keys" and "Sticky Keys." I disabled any of these features. That could possibly interfere with regular keyboard function. Then, I investigated the language settings. I made sure the correct keyboard layout was selected. Still, it was not working. So, I moved on to the next phase.
Cleaning Up the Mess: A Physical Inspection and Cleaning
With software ruled out, I decided to be physical. I powered down the laptop. Then, I unplugged the power cord. I flipped it over. Using a can of compressed air, I carefully blow air in the keyboard's crevices. I hoped to dislodge any unseen debris. Maybe a crumb. Perhaps dust. Then, I used isopropyl alcohol with a cotton swab. I gently cleaned the surface around the keys. After all this, I waited a few minutes. I slowly turned the laptop back on. Yet, the keyboard remained unresponsive.
The Grim Reality: Potential Hardware Problems
At this point, I accepted the most likely reality. The internal keyboard had failed. The problem was probably the hardware. It could be a damaged cable. Maybe a faulty component. Or perhaps, the keyboard itself was damaged. The worst-case scenario would involve replacing it. That would require taking my laptop apart. And maybe, I wasn't ready.
Calling in the Professionals: Seeking Expert Help
Since this was a critical problem, I considered my options. I could attempt a more advanced repair myself. But, I'm not a certified technician. Therefore, I decided to take it to a professional. I searched online. I found a local computer repair shop. I had to find someone with experience. A good tech could diagnose the issue quickly. They could also provide the best solution. This might involve replacement. Or maybe not.
Preventative Measures: Protecting Your Keyboard
The repair process can be lengthy. Keyboard failures are annoying. So, how can you prevent this? Firstly, clean your keyboard regularly. Remove dust and debris. Secondly, avoid eating or drinking near your laptop. Thirdly, consider a keyboard cover. This is a solid shield against spills. Also, back up your data! This protects your vital files. This is always critical.
Final Thoughts: Moving Forward
My keyboard died! But I found various potential solutions. I identified the problem. External keyboards can provide an immediate fix. You should troubleshoot every software aspect. A physical inspection can reveal obvious issues. Ultimately, this is not the end of the world. Every computer is bound to face hardware issues. The critical thing is to keep calm. And remember that there are various available solutions. Good luck!
Mac Laptop Camera Dead? 😱 FIX IT NOW!Laptop Keyboard DEAD! Emergency Fix (NOW!)
Hey there, fellow tech travelers! Have you ever stared at your laptop screen, fingers hovering, only to realize that your keyboard has decided to take an unscheduled vacation? Cue the internal scream! We've all been there, haven't we? That sinking feeling when your commands vanish into the digital abyss, leaving you stranded like a digital Robinson Crusoe. Well, don’t panic! We're here to navigate this keyboard crisis together. Consider this your survival guide, your digital defibrillator for a suddenly lifeless keyboard. Let’s get your typing life back on track, fast!
1. The Dreaded Black Screen of Typing Death: What's Happening?
Before we jump into solutions, let's understand the enemy. A dead keyboard can be caused by a multitude of gremlins – from software conflicts to hardware malfunctions. Think of it like this: your laptop's keyboard is a delicate ecosystem. One little glitch can throw the whole thing off. It could be a driver issue, a physical obstruction, a spilled drink, or sadly, a hardware failure. Knowing the potential culprits is the first step toward resurrection. The good news is, many of these issues have surprisingly simple fixes!
2. First Response: The Obvious (But Often Overlooked) Checks
Before you start imagining elaborate repair scenarios, let's do a quick triage. We have to be meticulous in the initial steps. It's like checking the simplest things like breathing and heartbeat just before thinking about surgery. The first thing we have to verify is the most obvious:
- Is the laptop plugged in? Sounds silly, I know, but a dead battery can mimic a dead keyboard situation. Double-check that little power cable is securely connected.
- Restart, Restart, Restart! This is the digital equivalent of "turn it off and on again." A simple reboot can often resolve minor software glitches. It's like a digital reset button that clears out temporary errors.
- External Keyboard Test: If you have an external keyboard handy, plug it in. Does it work? If yes, it's almost certainly a problem with your internal keyboard. If no, the problem might be deeper – possibly in the operating system itself.
- Check the Keyboard shortcut: Some laptops will have a shortcut key combination to enable or disable the keyboard. Make sure that you have not accidentally toggled it, and that you have not accidentally pressed that key combination.
3. Software Troubles? Diving Into Driver Drama
Drivers are essentially the translators that let your keyboard communicate with your laptop's operating system. If the driver is corrupted or outdated, you could run into problems. Think of a driver as the road map, if the road map is corrupted the machine will not function smoothly. One of the many things that you can do is:
- Driver Update: This is the most common culprit. Go to your Device Manager (search for it in your Windows search bar or access it through the control panel) and look for "Keyboards." Right-click on your keyboard and select "Update driver." Let it search automatically for updates online.
- Driver Rollback: Did the keyboard stop working after you updated something? You can try rolling back the driver to a previous version. In the Device Manager, right-click your keyboard, go to "Properties," then "Driver," and "Roll Back Driver."
- Uninstall and Reinstall: If updates and rollbacks fail, try uninstalling the keyboard driver entirely. Then, restart your laptop. Windows should automatically reinstall the driver upon reboot.
4. Physical Obstructions: The Sticky Keys Scenario
Ah, the perils of eating and drinking around your laptop! A spilled coffee, a crumbly snack, or a buildup of dust can wreak havoc on your keyboard. This is where we get a little more hands-on.
- The Gentle Air Blast: Grab a can of compressed air (you know, the stuff used to clean electronics). Gently blow air between the keys to dislodge any crumbs or debris. Avoid excessive pressure.
- The Sticky Key Dance: If you have sticky keys, try gently pressing the keys and cleaning around them with a Q-tip dipped in isopropyl alcohol (make sure the laptop is off and unplugged!). This can help dissolve sticky residue.
- The Dismantling Dilemma (Proceed with Caution!): Removing the keys is rarely the optimum solution. If you are comfortable with these kinds of repairs, then proceed with caution.
5. The Great Spill: Liquid Damage and What to Do (Immediately!)
If you’ve spilled liquid on your keyboard, time is of the essence! This is the most immediate and time-sensitive part of the entire process.
- Immediate Action: Unplug your laptop immediately and turn it upside down to drain any liquid. If you've spilled water, you're in better shape than if it's a sugary drink.
- The Rice Myth (Sort Of): Rice can help absorb moisture, but it's not a miracle cure. Remove the battery (if possible), and leave your laptop disassembled in a dry, well-ventilated area for at least 24-48 hours.
- Professional Help: If the spill was significant or the keyboard is showing persistent problems, it’s best to seek professional repair. Internal corrosion from liquids can cause long-term damage.
6. Hardware Hang-ups: When the Keyboard Bites the Dust
Sometimes, the problem is a hardware failure. This could be a faulty keyboard cable, or the keyboard itself has simply given up the ghost.
- Cable Check (If You're Tech-Savvy): Some laptops allow you to access the keyboard cable. If you're comfortable opening your laptop (and know how to safely handle the internals), you can check if the cable is loose or disconnected. Reconnecting it could resolve the issue.
- Keyboard Replacement: This is a more advanced fix, but often the most effective. Replacement keyboards are usually available online and can be relatively easy to install (depending on your laptop model). Just be sure to match the correct keyboard to your specific laptop.
- Professional Diagnosis: If you're not comfortable with hardware repairs, take your laptop to a qualified technician. They can diagnose the problem and recommend the best course of action, which may include a keyboard replacement or even motherboard repair.
7. Testing, Testing, 1, 2, 3: The Typing Test
Once you've applied a fix, it's time to test! Open a text editor (like Notepad on Windows or TextEdit on Mac) and start typing. Test all keys, including function keys, number pad, and special characters. Make sure everything is working as it should.
8. The External Keyboard Advantage: Bypassing the Broken
In the meantime, while you're working on the internal keyboard solutions, consider an external keyboard. This is the perfect temporary fix if you need to keep working. Plug it into your laptop, and you're back in business!
9. Accessibility Features: Keyboard Navigation Alternatives
If your keyboard is completely unresponsive, you can use the on-screen keyboard. On Windows, search for "On-Screen Keyboard" in the search bar. On macOS, go to System Preferences > Accessibility > Keyboard > Show Keyboard Viewers in the menu bar.
10. Preventive Measures: Keeping Your Keyboard Happy
Prevention is always better than cure! Here's how to keep your keyboard in tip-top shape:
- Gentle Handling: Avoid slamming keys or exposing your laptop to extreme temperatures.
- Regular Cleaning: Dust and wipe down your keyboard regularly with a microfibre cloth.
- Avoid Eating and Drinking: At your desk. It's inevitable that the odds will catch up with you at some point.
- Keyboard Covers: These are a great way to protect your keyboard from spills and debris.
11. Backup Your Data!
Always maintain a backup of your important data. This goes beyond keyboard issues, but it is very important to not lose your work.
12. Troubleshooting Keyboard Shortcuts
Some system shortcuts can help you troubleshoot or control your keyboard more effectively.
- Windows Key + R: To run the windows menu
- Ctrl + Alt + Delete: Brings up the task manager
13. When to Call for Help
Sometimes, keyboard issues are more complex, requiring professional intervention.
- Persistent Problems: If the keyboard issues continue after trying the steps described, it is time to consult a specialist.
- Advanced Problems: Severe liquid damage and hardware failures may require specialized help.
14. Cost-Effective Solutions
Replacing your keyboard may cost less than anticipated. You can search online for replacements, or check with local repair shops.
15. After the Fix: Futureproofing Your Tech
- Ongoing Care: Continue cleaning the keyboard regularly. Preventative maintenance is key.
- Learn New Tricks: Keep practicing with different shortcuts as well.
Closing Thoughts: Back in the Typing Saddle!
So there you have it! We hope by now you've managed to bring your laptop keyboard back from the brink. Remember, the steps we have outlined are just a starting point. It’s like learning to fix a flat tire – the first time can be daunting, but with a bit of practice and confidence, you'll be a keyboard repair wizard in no time. Don't let a dead keyboard hold you back – go forth and type!
Laptop Pointer MIA? This SHOCKING Fix Will Save Your Day!How to disable laptop keyboard when external plugged in

By IT Magics How to disable laptop keyboard when external plugged in by IT Magics
Fix In 3 Seconds - Volume Control Keys, Mute Button Not Working Microsoft Surface Pro Windows
By Mechanical Mike Fix In 3 Seconds - Volume Control Keys, Mute Button Not Working Microsoft Surface Pro Windows by Mechanical Mike
Keyboard Typing Numbers Instead of Letters Fix DisableEnable Fn Lock
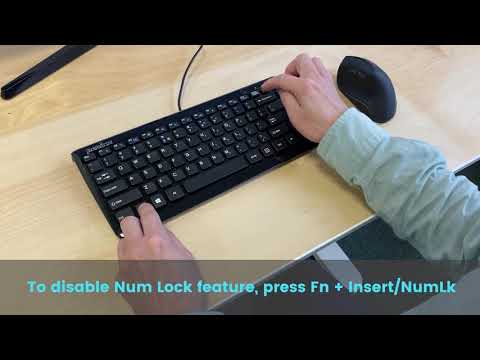
By Perixx Keyboard Typing Numbers Instead of Letters Fix DisableEnable Fn Lock by Perixx
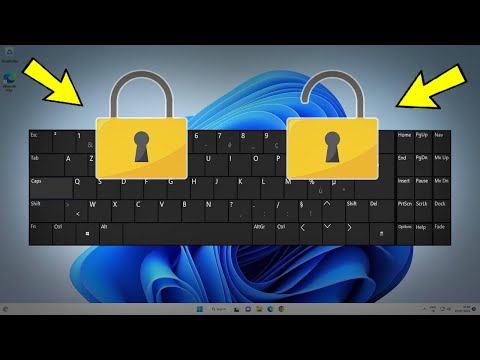
Title: How to Lock & Unlock Keyboard in Windows 11 10 8 7 Turn On Off keyboard lock
Channel: Victor Explains
How to Lock & Unlock Keyboard in Windows 11 10 8 7 Turn On Off keyboard lock by Victor Explains
Laptop Wifi Hotspot
Laptop Keyboard DEAD! Emergency Fix (NOW!)
The heart of any laptop, the command center of our digital lives, is often overlooked until it fails: the keyboard. When those keys go silent, it can feel like your connection to the world has vanished. Panic sets in. Deadlines loom. Projects grind to a halt. But before you consider a complete system overhaul or resign yourself to a productivity standstill, breathe. There's a high likelihood that you can diagnose and, more importantly, fix your laptop keyboard issues right now. This isn't just a troubleshooting guide; it's a roadmap to reclaiming your digital freedom, filled with proven solutions and immediate actions.
I. Initial Assessment: Pinpointing the Problem
Before diving into repairs, a swift and accurate diagnosis is paramount. This initial assessment separates the potentially simple fixes from more complex, hardware-related failures. Let's methodically rule out potential culprits.
A. The Obvious: Power and Connection
Battery Check: Ensure your laptop is adequately powered. Plug the AC adapter directly into a wall outlet and verify that the charging indicator illuminates. Low battery can sometimes interfere with proper system functionality, including keyboard responsiveness. Try restarting your machine after ensuring it’s charging.
External Keyboard Test: The quickest way to isolate a keyboard problem is to connect an external keyboard. If the external keyboard works flawlessly, the issue almost certainly resides within your laptop's internal keyboard. If the external keyboard also fails, we're dealing with a broader system-level problem. This step is absolutely critical.
USB Port Verification (if using an external keyboard): If your external keyboard doesn't function, try plugging it into a different USB port. A faulty USB port can prevent any device plugged into it from communicating effectively.
B. Software Snags: Ruling Out Conflicts
Driver Issues: Outdated or corrupted keyboard drivers are a common cause of malfunction.
- Windows: Press the Windows key + R, type
devmgmt.mscand press Enter. This opens the Device Manager. Locate the "Keyboards" section. Right-click on your keyboard device (it might be listed as "HID Keyboard Device" or a similar generic name) and select "Update driver." Choose to search automatically for updated driver software. If an update is found, install it and restart your laptop. - macOS: Go to the Apple menu > System Preferences > Keyboard. Check the "Keyboard" tab for any keyboard-related settings that might be causing issues. If nothing seems amiss, macOS generally handles keyboard drivers automatically; a standard troubleshooting step is to restart your machine.
- Windows: Press the Windows key + R, type
Sticky Keys and Filter Keys: These accessibility features, designed to assist users with disabilities, can sometimes interfere with normal keyboard operation.
- Windows: Press the Shift key five times in quick succession. A prompt will ask if you want to turn on Sticky Keys. If enabled, disable it to prevent accidental key presses from triggering the feature. Similarly, search for "Filter Keys" in your Windows settings and ensure it's deactivated if you suspect it may be interfering.
- macOS: Go to System Preferences > Accessibility > Keyboard. Make sure Sticky Keys and Slow Keys are off. Experiment with these settings if you might have enabled them accidentally.
System Restore (Windows): If the keyboard failure coincided with a recent software installation or update, consider using the System Restore feature. System Restore reverts your system to an earlier point in time, potentially undoing any software-related conflicts that might be affecting your keyboard. Search for "Create a restore point" in your Windows search bar and follow the on-screen instructions to restore to a previous state. Bear in mind you have options of the “Recommended restore” or “Choose a different restore point”. Be mindful of what the restore point contains before initiating.
II. Hardware Troubleshooting: Delving Deeper
If the initial assessments point towards a hardware problem, this section guides you through more in-depth troubleshooting steps. Proceed with caution. Before opening your laptop, ensure that you have the necessary tools (a small Phillips head screwdriver, a plastic spudger or plastic opening tools). The tools should be non-conductive.
A. Powering Down and Disconnecting:
Completely Shut Down: Before touching any internal components, shut down your laptop completely. Do not simply put it to sleep or hibernate.
Unplug the AC Adapter: Disconnect the power cord from the laptop and the wall outlet.
Remove the Battery (If Possible): This is crucial for certain laptops. Consult your laptop's manual or search online for instructions on how to safely remove the battery for your specific model. Removing the battery ensures the laptop is completely de-energized, minimizing the risk of electrical damage or personal injury.
B. Keyboard Disassembly: A Step-by-Step Guide
This process will differ slightly depending on your laptop model. Refer to your laptop’s manual or search online for disassembly guides specific to your model. The following steps outline the general process:
Locate Screws: Carefully examine the top case of your laptop, typically the area surrounding the keyboard. Look for small screws. They may be covered by rubber feet. Some are on the bottom.
Remove Screws: Use the correct-size Phillips head screwdriver to slowly and carefully unscrew any screws. Place the screws in a safe place. Label and organize them if possible; they are often of differing sizes.
Keyboard Bezel or Frame Removal: Some laptops have a separate bezel or frame that surrounds the keyboard. It may be secured by clips or screws. Use the plastic spudger or opening tools to gently pry the bezel away from the laptop chassis. Work slowly and cautiously to avoid breaking any clips.
Keyboard Lifting: The keyboard is usually held in place by plastic clips or screws. Carefully lift the keyboard from the top. It may be attached to the motherboard by a ribbon cable.
Disconnect the Keyboard Ribbon Cable: This is vital! The keyboard connects to the motherboard via a small, flexible ribbon cable. Most ribbon cables have a small locking mechanism. Locate this and unlock it before attempting to disconnect the cable. Use the plastic spudger to gently pry the locking mechanism open. Do not force the cable out; forcing it could damage the pins on the motherboard. Then, gently slide the ribbon cable out of its connector.
C. Keyboard Cleaning and Inspection
With the keyboard removed, we now have the opportunity to inspect it and clean it.
Visual Inspection: Carefully examine the keyboard for any visible signs of damage, such as cracked keys, broken keycaps, or liquid spills. Also, check the ribbon cable and the connector on the motherboard for any signs of corrosion or damage.
Keycap Removal: If a keycap is damaged or sticky, you can carefully pop it off using a small flathead screwdriver or the plastic spudger. Be very gentle. Many keys have small plastic clips that can break easily.
Cleaning: Use a can of compressed air to blow out any dust, debris, or crumbs that may have accumulated under the keys. You can also use a soft brush. Avoid using liquids directly on the keyboard. For stubborn grime, you can moisten a cotton swab with isopropyl alcohol (70% or higher) and gently clean the area, but always let the keyboard dry completely before reassembling it.
Ribbon Cable Reconnection: Inspect the ribbon cable – ensure that the connector is clean and without any damage. Carefully reinsert the ribbon cable into its connector on the motherboard. Make sure it's seated properly. Close the locking mechanism on the connector to secure the cable.
D. Reassembly and Testing
Keyboard Replacement: Carefully align the keyboard with the chassis and any mounting points.
Screw Replacement: Secure the keyboard with the screws you removed earlier. Again, organize the screws according to size and position.
Bezel/Frame Reattachment: If your laptop has a bezel/frame, carefully snap it back into place, ensuring all clips are properly seated.
Re-assemble the remaining pieces.
Battery and Power Up: Reconnect the battery (if you removed it) and plug in the AC adapter. Power on your laptop.
Testing: Test the keyboard. Open a text editor or word processor and type. Check all the keys. If the keyboard is working, you've successfully resolved the issue!
III. Advanced Solutions and When to Seek Professional Help
If the previous steps failed to rectify the dead keyboard issue, more drastic measures might be needed.
A. Keyboard Replacement:
If cleaning and inspection aren't successful, the keyboard may be permanently damaged. Replacing the keyboard is a viable option, and it's a repair many laptop owners can undertake themselves.
- Identify Your Keyboard Model: Before buying a replacement keyboard, you must identify the exact model of your laptop. This information is often on a sticker on the bottom.
- Source a Replacement: Purchase a replacement keyboard from a reputable online retailer. Check the reviews and ensure the keyboard is compatible with your laptop model.
- Installation: The installation process mirrors the disassembly steps of the previous section, but in reverse.
B. Motherboard Issues:
If the keyboard still doesn't function after
