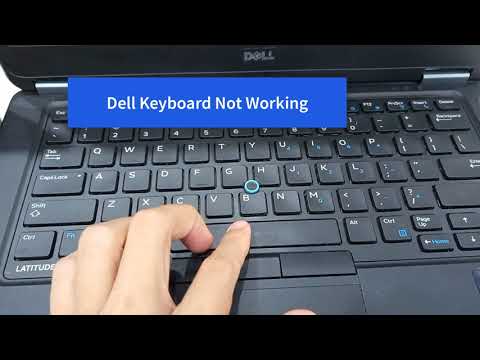
dell laptop keyboard not working once in windows windows 10

Title: FIX Dell Keyboard Not Working Windows 10 Dell Inspiron 15 3501
Channel: Cap Trong Nam - How To
FIX Dell Keyboard Not Working Windows 10 Dell Inspiron 15 3501 by Cap Trong Nam - How To
dell laptop keyboard not working after windows 10 update, dell laptop number keys not working windows 10, dell laptop keyboard not working windows 10
Dell Laptop Keyboard DEAD? (Windows 10 Fix Inside!)
Dell Laptop Keyboard Issues: Troubleshooting Tips & Tricks
Oh No! My Dell Laptop Keyboard Isn't Working!
Panic sets in. Your Dell laptop keyboard has suddenly decided to go on strike. You’re frantically searching for solutions. Typing is essential. Working, studying, or even just browsing the internet becomes a frustrating ordeal. Don't fret! We’ve all been there. Fortunately, most keyboard woes have straightforward fixes. Let’s dive right in!
Pinpointing the Problem: Is It Hardware or Software?
Before you tear your hair out, assess the situation. Is the entire keyboard unresponsive? Or are certain keys acting up? Do external keyboards work correctly? These initial observations are crucial. Consider this: A completely dead keyboard could signal a hardware failure. However, a few malfunctioning keys might suggest software glitches. Think critically here. Understanding the issue’s scope helps narrow down the solutions.
Troubleshooting Steps: The Software Side of Things
First, restart your laptop. Very basic, but often effective! Sometimes, a simple reboot clears temporary software bugs. If restarting doesn’t help, proceed. Next, run the Windows troubleshooter. Navigate to your settings and search for "troubleshoot." Find the keyboard troubleshooter. It may identify and fix automatic issues. So, let the system do its work.
Another important step: Check your keyboard drivers. Outdated or corrupted drivers can cause havoc. Go to Device Manager (search for it in the Windows search bar). Expand the "Keyboards" section. Right-click on your keyboard. Select "Update driver." Choose "Search automatically for drivers." Windows will find and install the latest drivers. Afterwards, restart your laptop again.
Keyboard Filter Drivers and How They Affect You
Sometimes, filter drivers interfere. These drivers modify keyboard input. They may be corrupted. Open Device Manager again. Look under "Keyboards". Right-click on your keyboard and select "Properties". Now, check the "Driver" tab. See if any keyboard filter drivers are listed. If so, consider uninstalling and reinstalling them. In order to achieve this, you must uncheck the "Show Compatible Hardware" option.
Advanced Troubleshooting: Exploring the Registry (Use with Caution!)
This step is for the more tech-savvy, and involves the registry. Incorrect registry edits can cause system instability, so be cautious. First, create a system restore point. Type "Create a restore point" in the Windows search bar. Then, open the Registry Editor (regedit.exe). Navigate to: HKEY_LOCAL_MACHINE\SYSTEM\CurrentControlSet\Control\Class\{4D36E96B-E325-11CE-BFC1-08002BE10318}. Locate the "UpperFilters" and "LowerFilters" entries. Delete them if they exist. Restart your computer.
Hardware Diagnostics and Preliminary Checks
If software solutions fail, hardware might be the culprit. Begin with simple checks. Ensure nothing is stuck under the keys. Tiny crumbs or debris can jam keys. Try gently cleaning the keys with compressed air. Next, give the laptop a once-over. Inspect for any physical damage. Have you recently spilled liquids? This can wreak havoc.
External Keyboard Test and Diagnosis
Do external keyboards function? If an external keyboard works, it points to an internal hardware issue. This is a crucial piece of diagnostic information. Next, detach the battery and power cord. Hold the power button down for 30 seconds. This drains any residual power. Then, reconnect the power and try again. Sometimes, this resolves certain glitches.
Potential Hardware Issues and When to Seek Professional Help
Beyond the basics, consider hardware failure. The keyboard ribbon cable might be loose. Or the keyboard itself could be malfunctioning. If you are comfortable, you can try accessing the keyboard internally. However, this can void your warranty. Therefore, it’s best to seek professional help. Contact Dell support as the next step. They can offer advanced troubleshooting. If the laptop is under warranty, take advantage of it. They'll diagnose the issue. If the issue is hardware related, they may replace the keyboard.
Preventive Measures: Keeping Your Keyboard Happy
Avoid eating over your keyboard. This helps prevent debris buildup. Keep your hands clean. Ensure proper ventilation to avoid overheating. Regular maintenance is always best. Furthermore, use a keyboard cover for extra protection. Back up your data regularly. Lastly, be gentle while typing.
Final Thoughts: Don't Give Up!
Keyboard problems are frustrating. However, they are often fixable. First, exhaust software troubleshooting. Then, check for hardware issues. Don't panic if it seems complex. Always, remember that persistence pays off. You can get your keyboard working. Happy typing!
Aura Sync Nightmare? Fix Your ASUS Laptop's Lighting NOW!Dell Laptop Keyboard DEAD? (Windows 10 Fix Inside!)
We've all been there. You're in the middle of drafting the magnum opus, a game-changing email, or perhaps just trying to binge-watch your favorite series when… disaster strikes. Your Dell laptop keyboard has decided to take a permanent vacation. It's like your trusty companion has suddenly gone silent, leaving you staring at a frozen screen and a growing sense of panic. No clicks, no taps, no response. Is it permanently dead? Before you start pricing new laptops or weeping into your coffee, let's breathe. We're going to navigate this together. This guide is designed to get your Dell laptop keyboard back in action, specifically for those running Windows 10. Think of it as your troubleshooting survival kit.
Why Did My Dell Laptop Keyboard Suddenly Stop Working?
First things first, let's understand the “why.” Like trying to diagnose a friend's ailments, we need to assess the symptoms before we start prescribing treatments. A non-functioning Dell laptop keyboard can stem from a variety of causes, ranging from the simple to the, well, slightly more complex. It could be a software hiccup, a driver issue, a hardware glitch, or something else entirely. Think of it like your car: sometimes it just refuses to start, and you need to pop the hood to do a quick check.
1. The Obvious Checks: Before You Panic!
Before we dive into the technical abyss, let's cover the basics. Sometimes the simplest solutions are the most effective, like remembering to breathe when you're stressed.
- Restart Your Laptop: This is the digital equivalent of hitting the reset button. Often, a simple reboot clears temporary glitches. It's akin to shaking the snow globe to restore order.
- Check the Power: Ensure your laptop is sufficiently powered (or plugged in!). A low battery can sometimes cause strange behavior. Let's make sure the lights are on, and the juice is flowing!
- External Keyboard? If you have any external keyboard lying around, connect it to your Dell. Does it work? This can help determine whether the issue is with the laptop's keyboard itself.
2. Restart Your Laptop in Safe Mode – A Diagnostic Power-Up
Safe Mode is like a stripped-down version of Windows. It loads only the essential drivers and services, minimizing the possibility of conflicts. This allows us to isolate the problem. If your keyboard works in Safe Mode, it's a strong indication that a software issue is at play.
- How to Enter Safe Mode:
- Restart your Dell laptop.
- Repeatedly press the F8 key (or Shift + F8) during startup until you see the Advanced Boot Options menu.
- Select "Safe Mode" and press Enter.
3. Driver Detective: Update or Reinstall Your Keyboard Drivers
Drivers are the translators between your hardware and your operating system. An outdated, corrupted, or missing keyboard driver can be the culprit. Like a broken language interpreting system, this can lead to a keyboard that doesn’t speak the same language as your computer!
- Updating Drivers:
- In the Windows search bar, type "Device Manager" and open it.
- Expand "Keyboards."
- Right-click on your keyboard (likely a "PS/2 Standard Keyboard" or similar) and select "Update driver."
- Choose "Search automatically for drivers."
- Reinstalling Drivers:
- Follow steps 1 and 2 above.
- Right-click on your keyboard and select "Uninstall device."
- Restart your laptop. Windows should automatically reinstall the driver.
4. Keyboard Filters and Sticky Keys: Unmasking the Hidden Culprits
Sometimes, hidden Windows features can interfere with keyboard functionality. Think of these as the unseen gremlins that wreak havoc behind the scenes.
- Filter Keys: Filter Keys are specifically made to ignore or slow down brief or repeated keystrokes. Sometimes, if enabled incorrectly, it can make your keyboard appear unresponsive. Go to the settings menu and search for "Filter Keys" and disable it.
- Sticky Keys: Sticky Keys let you press modifier keys (Ctrl, Shift, Alt, and the Windows key) one at a time instead of simultaneously. Again, this can sometimes interfere with keyboard behavior. Navigate to the "Ease of Access" settings in Windows and look for "Sticky Keys." Make sure it's turned off.
5. Run the Windows Troubleshooter – Your Built-In Mechanic
Windows has a built-in keyboard troubleshooter that can automatically detect and fix common problems. It's like having a built-in mechanic for your computer.
- How to Run the Troubleshooter:
- Go to Settings > Update & Security > Troubleshoot.
- Click on "Keyboard" and then "Run the troubleshooter."
6. Virus Scan: Rooting Out the Digital Grubs
Malware can sometimes interfere with system functions, including your keyboard. It's best to run a full system scan with your preferred antivirus software. Think of this as fumigating your digital house!
7. Check for Hardware Damage: The Internal Inspection
If the above steps haven't helped, the problem may be hardware-related. This can be more tricky, like diagnosing a problem in your engine’s internals.
- Examine the Keyboard: Look for any physical damage, such as loose keys or spills.
- Professional Help: If you suspect hardware damage, it's best to seek professional assistance. Opening your laptop can void the warranty (if still active), and tampering with internal components can cause further damage.
8. BIOS Update: The Firmware Upgrade
While less common, an outdated BIOS (Basic Input/Output System) can sometimes cause keyboard issues. This is like updating your car's firmware.
- Caution: BIOS updates can be risky. Be sure to follow the manufacturer's instructions carefully.
- Dell Support: Visit the Dell support website and find the BIOS update for your specific laptop model.
9. Create a New User Profile
Sometimes, corrupted user profiles can cause all sorts of problems, including keyboard issues. Creating a new user profile can help isolate the problem.
- How to Create a New User Profile:
- Go to Settings > Accounts > Family & other users.
- Click "Add someone else to this PC."
- Follow the on-screen instructions.
10. Restore Your System – A Blast From The Past
If the keyboard stopped working recently, you can try a system restore. This will revert your system to a previous point in time when the keyboard was working correctly. Think of it like going back in time to fix something you messed up!
- How to Perform a System Restore:
- In the Windows search bar, type "Create a restore point" and open it.
- Click "System Restore."
- Follow the on-screen instructions.
11. External Keyboard Test – Validation of the Issue
As previously mentioned, connecting an external keyboard is a good test. If it works, you know the internal keyboard is the source of the problem. This is like having a second opinion!
12. Clean the Keyboard – Remove the Grime
Believe it or not, a dirty keyboard can cause issues. Dust, crumbs, and other debris can get stuck under the keys and interfere with their function. Think of this as dusting around your laptop.
- Use Compressed Air: Gently blow compressed air between the keys to remove debris.
- Turn Off & Clean With a Damp Cloth: Use a slightly damp (not wet) microfiber cloth to clean the surface of the keys. Make sure to turn the laptop off beforehand.
13. Windows Update Issues: Fixing the Bugs
Sometimes, Windows updates can introduce issues. Make sure your Windows installation is up-to-date to ensure that all the latest fixes are applied.
- How to Check for Windows Updates:
- Go to Settings > Update & Security > Windows Update.
- Click "Check for updates."
14. Factory Reset – The Nuclear Option
If all else fails, a factory reset restores your laptop to its original factory settings. This is like a complete system overhaul. Be warned, however, this will delete all your data! Make sure you back up your important files before proceeding.
- How to Perform a Factory Reset:
- Go to Settings > Update & Security > Recovery.
- Under "Reset this PC," click "Get started."
- Follow the on-screen instructions.
15. Contact Dell Support – Call in the Experts
If nothing works, it's time to contact Dell support. They can provide further troubleshooting assistance and help you determine whether a repair or replacement is needed. This is like calling a professional mechanic when you can't fix the car yourself!
The Light at the End of the Tunnel
Dell laptop keyboards, in the throes of a silent treatment, can be frustrating. But we, armed with these troubleshooting steps, are not powerless. The process is like detective work, each step leading us closer to the heart of the problem. With patience and
Work From Home DREAM MACHINE: 2020's BEST Laptop!Fix Keyboard not working in Windows 1011 shorts

By DA1M Fix Keyboard not working in Windows 1011 shorts by DA1M
Fix Dell Keyboard Not Working Windows 11 - 4 Solutions 2025

By TechFixIT Fix Dell Keyboard Not Working Windows 11 - 4 Solutions 2025 by TechFixIT
FIX Dell Keyboard Not Working Windows 10 Dell Latitude E7450 Laptop
By Cap Trong Nam - How To FIX Dell Keyboard Not Working Windows 10 Dell Latitude E7450 Laptop by Cap Trong Nam - How To
Title: FIXED Keyboard Not Working After Windows Update in Windows 1011
Channel: TechFixIT
FIXED Keyboard Not Working After Windows Update in Windows 1011 by TechFixIT
Laptop Wifi Connect
Dell Laptop Keyboard DEAD? (Windows 10 Fix Inside!)
It’s a heart-stopping moment: you reach for your Dell laptop keyboard, ready to craft emails, finalize presentations, or simply surf the web, and…nothing. The keys lie dormant, refusing to respond to your touch. Panic sets in, amplified by the realization that a malfunctioning keyboard can cripple productivity. But before you rush to conclusions about costly repairs or a replacement, know this: we've encountered this situation countless times, and more often than not, the solution lies within your grasp. This guide is designed to walk you through a comprehensive set of troubleshooting steps, equipped to resuscitate that stubborn Dell laptop keyboard and get you back on track.
Initial Assessment: Pinpointing the Problem
The first, and arguably most critical, step is to accurately diagnose the root cause. Jumping to conclusions can lead to wasted time and unnecessary frustration. We begin with a systematic evaluation to narrow down the possibilities.
1. Power Cycle and Basic Checks:
The Reboot: Before you delve into complex diagnostics, perform a hard reboot. This often resolves many temporary software glitches that can affect peripheral devices. Fully shut down your Dell laptop, wait for at least 60 seconds, and then restart. This clears the system's cache and allows the hardware to reinitialize.
External Keyboard Test: If possible, connect an external USB keyboard to your Dell laptop. If it functions correctly, the issue is likely with the internal keyboard itself. If the external keyboard also doesn't work, the problem might lie deeper in the operating system, USB ports, or even the laptop's motherboard (though this is less common).
Caps Lock Indicator: Observe the Caps Lock key. Does the indicator light (if your model has one) illuminate when pressed? This can provide clues. If the light does respond, then the keyboard is at least partially recognized by the system – the issue may be software-related. If the light doesn't respond, it directs us towards a hardware-related issue or driver problem.
2. Software vs. Hardware: The Differentiating Factor
The next stage focuses on distinguishing between software and hardware causes. This helps direct our troubleshooting efforts.
Safe Mode Boot: Boot your Dell laptop into Safe Mode. Safe Mode loads Windows with a minimal set of drivers and services. If the keyboard functions correctly within Safe Mode, it strongly suggests that a third-party driver, application, or a corrupted system file is interfering with its operation. If the keyboard is still unresponsive in Safe Mode, hardware is the more likely culprit.
BIOS Access: During the startup process, frequently press the Delete, F2, F10, or F12 keys, depending on your Dell model, to access the BIOS (Basic Input/Output System) or UEFI (Unified Extensible Firmware Interface) settings. The keyboard should always function in the BIOS, even if it's not working in Windows. If the keyboard doesn't work in the BIOS, this points to a hardware fault.
Troubleshooting Software-Related Keyboard Issues
Assuming the initial assessment indicates a software-related problem, the following steps are designed to eliminate common sources of conflicts.
1. Driver Updates and Reinstallation:
Device Manager Inspection: Open the Device Manager (search for "Device Manager" in the Windows search bar). Expand the "Keyboards" section. If you see a yellow exclamation mark or any indication of an error, it signifies a problem with the keyboard driver.
Driver Update: Right-click on your keyboard entry (e.g., "Standard PS/2 Keyboard") and select "Update driver." Choose "Search automatically for drivers." Windows will attempt to find and install the latest drivers.
Driver Reinstallation: If updating doesn't work, uninstall the keyboard driver by right-clicking on it and selecting "Uninstall device." Restart your laptop, and Windows should automatically reinstall the default keyboard driver.
2. Troubleshoot Keyboard Settings
Filter Keys: Check if Filter Keys, Sticky Keys, or Toggle Keys are enabled. These accessibility features can sometimes interfere with normal keyboard function. Go to Control Panel > Ease of Access > Ease of Access Center > Make the keyboard easier to use. Ensure these features are disabled unless intentionally required.
Regional and Language Settings: Incorrect language settings can, at times, affect keyboard behavior. Go to Settings > Time & Language > Language and ensure that the correct language and keyboard layout are selected.
3. System File Corruption and Malware:
System File Checker (SFC) Scan: Corrupted system files can lead to various issues, including keyboard malfunctions. Open Command Prompt as an administrator (search for "cmd," right-click, and select "Run as administrator") and type
sfc /scannow. This command scans and repairs corrupted system files.Malware Scan: Run a full scan with your antivirus software. Malware can sometimes interfere with the functionality of hardware components.
Addressing Hardware-Related Keyboard Problems
If the above software solutions fail, it's time to investigate potential hardware issues. This typically requires a more hands-on approach.
1. Cleaning the Keyboard:
Air Duster: Use compressed air to clean out the keyboard. Dust, crumbs, and debris can accumulate under the keys, causing them to malfunction or become unresponsive. Direct the air stream at a slight angle to dislodge any trapped particles.
Isopropyl Alcohol: If the keyboard has suffered liquid damage, or you suspect stickiness from sugary drinks, use a cotton swab dipped in isopropyl alcohol (70% or higher). Gently clean around the affected keys. Be careful not to pour liquid directly onto the keyboard. Allow the keyboard to dry thoroughly before using it.
2. Keyboard Cable Connections:
Internal Inspection: If you're comfortable with the technical aspects, you can remove the keyboard and check the internal connection. This will require you to take extreme caution due to the sensitive components of your computer. Refer to your Dell laptop's service manual or online guides to see how to remove the keyboard without causing damage.
Cable Disconnection and Reconnection: Carefully disconnect and reconnect the keyboard cable to the motherboard. It is imperative to be extremely careful when working. Sometimes, a loose connection can be the source of the problem.
3. Keyboard Replacement:
Professional Repair: If the keyboard is clearly damaged (e.g., cracked, missing keys) or if the above steps don't resolve the issue, keyboard replacement is the most likely solution. Consider consulting a qualified technician.
DIY Replacement: If you're reasonably comfortable with basic computer repair, consider replacing the keyboard. The replacement is often a more cost-effective solution. Be sure to purchase a replacement that is compatible with your specific Dell laptop model. Dell laptops come in many different configurations; make sure the replacement is a perfect fit!
Preventative Measures and Maintenance
Once your keyboard is functioning correctly, take steps to prevent future issues.
1. Regular Cleaning:
Frequency: Clean your keyboard at least once a month, or more frequently if you tend to eat or drink near your laptop.
Technique: Use compressed air to dislodge debris. Use a soft cloth or a keyboard brush to wipe down the keys. Be sure to unplug your laptop or turn it off/disconnect the battery before cleaning.
2. Protective Covers:
- Silicone Covers: Silicone keyboard covers can protect against spills and dust.
3. Proper Storage:
- Laptop Bags: When transporting your laptop, keep it in a padded bag to prevent dust and debris from settling in your keyboard.
By following this guide, you've equipped yourself with the knowledge and steps required to resolve a non-functioning Dell laptop keyboard. Whether the issue is software-based, hardware-related, or something in between, you now have a systematic and effective approach to diagnose and repair the problem. Remember to take your time, proceed carefully, and always prioritize the safety of your laptop. With a little persistence, you'll restore full functionality to your Dell laptop's vital communication device, keeping you productive and connected.
