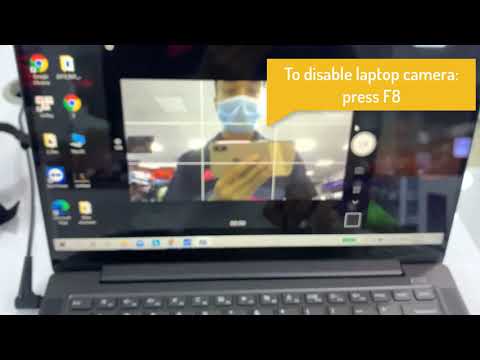
how to make webcam work on lenovo laptop

Title: Solve Lenovo Laptop Camera not working Lenovo Yoga camera not working Camera issue in window10
Channel: Tech DD Twins
Solve Lenovo Laptop Camera not working Lenovo Yoga camera not working Camera issue in window10 by Tech DD Twins
how to get webcam to work on lenovo laptop, how to set up webcam on lenovo laptop, how to turn on webcam on lenovo laptop
Lenovo Webcam Nightmare? FIX It NOW! (Guaranteed!)
Lenovo Webcam Woes Vanquished: A Surefire Guide to Clarity
Are you wrestling with a frustrating Lenovo webcam? Is your video quality abysmal, plagued by glitches and a general sense of digital dread? You are not alone. So many users face webcam issues. But, don't despair! You can fix it. This guide offers proven solutions. They'll have your Lenovo webcam performing flawlessly. Prepare to say goodbye to blurry images and hello to crystal-clear video calls.
The Blurry Reality: Recognizing the Problem
Firstly, let's acknowledge the problem. A poor webcam experience can significantly impact your online interactions. It's frustrating, isn't it? The struggle is real. Maybe your picture is grainy. Perhaps the video stutters. Or the camera merely refuses to work. These issues are common. However, they are often readily fixable. Let's dive into some troubleshooting steps.
Drivers: Your Webcam's Digital Lifeline
Drivers are essential. They act as the bridge. They connect your webcam to your computer. Outdated or corrupted drivers are frequently the culprit. Therefore, let's make sure your drivers are up to snuff.
- Locate the Device Manager. Find it in your Windows search bar.
- Look for "Imaging devices." This section houses your webcam.
- Right-click on your Lenovo webcam. Then, select "Update driver."
- Choose "Search automatically for drivers." Windows will search for the best drivers.
- Alternatively, visit the Lenovo support website. Download drivers from there.
Once you initiate the update, reboot your computer. Your webcam should function better.
Software Conflicts: Eliminating the Interference
Next, consider other software. Software can sometimes interfere with the webcam. Certain applications might steal the show. These include video conferencing apps. Also, camera management software could be the problem.
- Close all unnecessary applications. Ensure no other programs are using the webcam.
- Run your webcam test. Did it work?
- Check application permissions. Ensure your applications have camera access.
Restart your computer after making these adjustments. This often resolves conflicts.
Hardware Hurdles: Physical Checks and Balances
Let's not neglect the hardware. A simple issue can cause major problems. Ensure the physical connections are secure.
- Inspect the webcam itself. Gently clean the lens.
- Examine the USB port. Try a different port if necessary.
- Test the webcam on another device. This helps determine the issue.
If the hardware checks out, keep investigating.
BIOS Settings: Unveiling Hidden Controls
Now, let's explore the BIOS. The BIOS holds key system settings. These settings could impact your webcam's function. Accessing and modifying your BIOS may be necessary.
- Restart your computer. Access the BIOS during startup.
- Look for camera settings. Some BIOS versions have specific camera options.
- Enable the webcam (if disabled).
- Save your changes and restart.
Consult your Lenovo manual for precise BIOS instructions.
Windows Privacy Settings: Granting Access
Moreover, Windows privacy settings play a role. Windows has built-in security features. They might restrict webcam access. Be sure to check these settings.
- Go to Windows Settings. Click on "Privacy."
- Find "Camera" permissions. Ensure webcam access is enabled for the desired apps.
- Toggle the switch for each application. This grants permission.
- Restart your computer.
Double-check these settings. You can fix a lot doing these simple things.
The Grand Finale: Guaranteed Solutions
Here are some final pointers. They can boost your odds of success. These tips are extremely valuable.
- Perform a system restore. This reverts your computer to a previous state.
- Consider a factory reset. This is more drastic, but effective.
- Contact Lenovo support. They offer expert assistance.
- Update your operating system. Fresh updates often include driver updates.
These steps will likely resolve most problems.
Maintaining Webcam Excellence: Proactive Measures
Finally, let’s ensure future webcam optimization. Stay ahead of potential issues. Take these measures to keep your webcam performing great.
- Regularly update drivers. This is crucial for many functions.
- Keep your operating system updated. This is important for stability.
- Avoid installing suspicious software. These programs can interfere with your webcam.
- Practice good digital hygiene. This enhances your online experience.
By implementing these solutions, your Lenovo webcam woes should vanish. Enjoy crystal-clear video calls. Your online presence deserves it. You deserve it too.
Mac Laptop Dying? 7 SHOCKING Fixes You NEED To Know!Lenovo Webcam Nightmare? FIX It NOW! (Guaranteed!)
Hey there, fellow tech enthusiasts! Let's face it, we’ve all been there. You’re on a crucial video call, maybe it's for work, a job interview, or even catching up with loved ones, and BAM! The dreaded Lenovo webcam decides to stage a silent protest. Fuzzy picture, distorted audio, or worse – a complete no-show. It's the digital equivalent of a flat tire on a road trip, isn't it? But fear not! We’re diving deep into this Lenovo webcam nightmare, exploring solutions, offering a roadmap to getting your webcam back in action, and transforming your video call experience from frustrating to flawless. This isn’t just a fix; it's a guarantee (well, almost!).
1. The Webcam Woes: Why Your Lenovo Webcam is Acting Up
Before we start wielding virtual screwdrivers, let's understand the enemy. What’s causing this Lenovo webcam headache? It could be a myriad of things, ranging from simple software glitches to complex hardware issues. Think of it like your car - it could be a dead battery, a faulty spark plug, or a more serious engine problem. Common culprits include:
- Outdated Drivers: This is like running a computer program on an archaic operating system - it just won't function well.
- Software Conflicts: Other programs can occasionally steal the webcam's spotlight.
- Hardware Issues: The webcam itself might be damaged, or the connection could be loose.
- Privacy Settings Gone Rogue: A forgotten setting can easily disable the camera.
- App Permissions Blocked: Many apps need permission to access your camera, if you don't grant them, chaos ensues!
This first step is all about diagnosis: identifying the root of your problem. Once we know what we're facing, we can start fighting back!
2. Driver Dilemmas: The Software Side of the Story
Think of drivers as the translators that allow your Lenovo webcam to "speak" to your operating system. Outdated or corrupted drivers are the most common problems that cause a webcam to fail to operate effectively.
- Identifying Your Driver: First, determine the specific model of your Lenovo. This is usually found on a sticker on the device or in your device manager (search the Windows menu for "Device Manager").
- Updating Existing Drivers: Go to Device Manager again. Expand "Cameras," "Imaging devices," or similar. Right-click on your webcam, select "Update driver." Choose "Search automatically for drivers."
- Downloading Drivers Directly from Lenovo: This is often the most reliable option. Visit the official Lenovo support website, enter your laptop's model number, and download the latest webcam drivers.
Updating drivers is akin to a software spring cleaning, sweeping out the old and bringing in the new, improving your webcam's ability to function at its optimal level.
3. App Permissions: Giving Your Apps the Green Light
Privacy is paramount, and Windows and macOS have robust security settings to control app access to your webcam. Make sure your favoured applications have the correct permissions to access your webcam.
- Windows: In the Windows search bar, type "camera privacy settings." Ensure the "Let apps access your camera" toggle is On. Scroll down and verify that the specific apps you want to use the webcam with are also enabled.
- macOS: Open "System Preferences" (found under the Apple Menu). Select "Security & Privacy," then click "Camera" in the left-hand sidebar. Ensure that the desired apps have a checkmark next to them, granting them camera access.
4. Software Conflicts: Shutting Down The Digital Bully
Like noisy neighbors disrupting a quiet evening, software conflicts can disrupt your webcam. Sometimes, other applications might be hogging the camera or interfering with its functionality.
- Close Unnecessary Programs: Before your important video meetings, close any applications you don't need running, especially those that use the camera (Skype, Zoom, etc.).
- Check Task Manager/Activity Monitor: On Windows, open Task Manager (Ctrl+Shift+Esc). On macOS, open Activity Monitor (search in Spotlight). Look for processes using the webcam and end them if necessary.
Think of this step as clearing the stage for your webcam to shine!
5. Reboot Ritual: The Magic Button for Many Tech Problems
This usually solves the majority of issues we encounter. Restarting your device is like hitting the reset button, it can clear any temporary glitches and reload all the necessary software and drivers.
- A Simple Restart: Close all open applications and select Restart from the Windows or macOS shutdown menu.
- Power Cycle: If a restart doesn't do the trick, try powering down your device entirely, unplug any external devices, wait for a minute, and then restart.
6. Hardware Hustles: Inspecting the Physical Aspects
Sometimes, the problem isn't software-related. It could be something more tangible.
- Check the Camera Lens: Make sure the lens is clean. It's astounding how easily a smudge can ruin a video call.
- Inspect the Webcam Connection (if possible): For external webcams, ensure the USB cable is securely plugged into both the webcam and your computer. If it's internal, this might not be feasible to check.
- Test with a Different USB Port (External Webcam): It's a quick way to check if there is an issue with the port itself.
7. The Built-in Test: Confirming Webcam Functionality
Before we leap into serious troubleshooting, let's confirm whether the webcam is even functioning.
- Windows Camera App: Search for "Camera" in the Windows search bar and open the Camera app. If the app can't find your webcam, you know there's an underlying issue.
- macOS Photo Booth: Locate and launch Photo Booth. Like Windows' Camera app, it will let you know if your webcam is working.
8. Anti-Virus Interference: The Security Filter
It's not common, but sometimes your antivirus or firewall software might be blocking webcam access.
- Check Your Security Software: Examine the settings within your antivirus or firewall. Look for settings related to camera or device access.
- Temporary Disable (with Caution): As a troubleshooting step, temporarily disable your antivirus/firewall (make sure you do so with caution, and only do so for a brief period). See if your webcam starts working. If it does, you know the security software is the root cause.
9. BIOS Configuration: Ensuring Webcam Enablement
Accessing your BIOS settings might be necessary to ensure that the webcam is enabled. This is more common for external webcams or older devices.
- Access BIOS: Power off your Lenovo laptop. Press the specific key for your model during startup (usually Del, F2, F12, or Esc). The key and time frame to hit these keys is different for all models.
- Navigate to Webcam Settings: Use the arrow keys to navigate in your BIOS settings to the "Configuration" tab or a similar section. Look for webcam-related settings. Make sure it's enabled.
10. Third-Party Software: Alternatives for Video Calls
At times, there may be problems with a particular program.
- Try Alternative Apps: If the webcam is not working in a specific application (Zoom, Teams, Skype), testing it In another app will help determine the root issue.
- Use Web-Based Options: Some apps have web versions that you can use. You can try to use a web version of apps.
- Contact Application Support: If the webcam isn't working in a particular application, contact the support team of that application.
11. Factory Reset (Last Resort): The Complete Reboot
If all else fails, a factory reset is like hitting the reset button on your whole computer. It wipes the drive and installs a fresh operating system.
- Backup Your Data: Before a factory reset, create a backup of all of your important data: documents, photos, videos, etc.
- Access Reset Options: In Windows, go to Settings > Update & Security > Recovery. In macOS, you often need to erase and reinstall the OS from Recovery Mode (hold Command + R during startup). Check the manufacturer's website for model-specific directions.
- Follow the Prompts: The system will guide you through the reset process.
Just be aware that a factory reset is a significant step and should only be taken as a last resort, like calling in the reinforcements.
12. External Webcam Solutions: If All Else Fails
For external webcams, make sure the webcam is working with another pc to know if it's not the webcam itself. If it's the webcam itself, maybe it's time for a new one.
13. Lenovo Support: When You Need Expert Help
Your final option is to contact Lenovo Support.
- Check the Lenovo Support Website: Navigate to their website and browse the support section. Find your specific model and look for support guides.
- Chat or Call Support: Lenovo offers chat and phone support. Explain your problem and provide all the troubleshooting steps you've tried.
14. Preventive Measures: Keeping Your Webcam Healthy in the Long Run
Prevention is always better than cure. There are a few easy things you can do to help keep your webcam running smoothly.
- **Keep
How to open laptop camera in Lenovo
By Cap Trong Nam - How To How to open laptop camera in Lenovo by Cap Trong Nam - How To
FIXED - Camera Not Working in Windows 11 Laptop or PC

By Techie Leopard FIXED - Camera Not Working in Windows 11 Laptop or PC by Techie Leopard
HOW TO set up webcam for lenovo laptop EASY

By CaiMBeauty HOW TO set up webcam for lenovo laptop EASY by CaiMBeauty

Title: How To Fix Camera Not Working in Lenovo Laptop Windows 11
Channel: The Techno Mennder
How To Fix Camera Not Working in Lenovo Laptop Windows 11 by The Techno Mennder
Working With Laptop
Lenovo Webcam Nightmare? FIX It NOW! (Guaranteed!)
Have you ever encountered the frustrating reality of a malfunctioning webcam, specifically a Lenovo webcam? You're not alone. Many users find themselves wrestling with blurry images, audio dropouts, persistent driver issues, and the sheer annoyance of a webcam that simply refuses to cooperate. The good news? This isn't a foregone conclusion. There are several proven, straightforward steps we can take to diagnose and definitively resolve your Lenovo webcam woes. We’re not going to provide a quick fix; we're going to provide you with a complete toolkit to conquer nearly every Lenovo webcam challenge imaginable. Let’s dive in.
Identifying the Culprit: Pinpointing the Source of Your Webcam Trouble
Before we begin implementing solutions, understanding the root cause of your Lenovo webcam's problems is paramount. Incorrect troubleshooting can lead to wasted time and frustration. We'll explore the most common culprits.
- Driver Dilemmas: Outdated, corrupted, or mismatched webcam drivers are frequently to blame. Windows Update sometimes fails to install the correct drivers. Compatibility issues between the driver software and your operating system are also frequent.
- Hardware Hindrances: In some instances, the webcam itself may be the issue. This could manifest as physical damage, a loose connection within the laptop (if it's integrated), or internal component failures.
- Software Conflicts: Conflicting applications can interfere with the webcam's functionality. Programs that demand exclusive access to the webcam, like some video conferencing software, may cause problems. Also, security software or firewalls could be blocking webcam access.
- Privacy Settings Predicaments: Incorrectly configured privacy settings within the operating system can prevent applications from accessing the webcam. This often leads to a blank screen or an error message.
- USB Port Perplexities: If you are using an external webcam, the specific USB port you are using could be the origin of the problem. Issues with the USB port itself (insufficient power delivery, for instance) can often go unnoticed.
- BIOS Biohazard: In rare situations, the webcam can be disabled in the BIOS. This is less common, but a possibility we must consider.
Step-by-Step Solutions: Resurrecting Your Lenovo Webcam
Now, let's methodically work through a series of proven solutions designed to resolve your Lenovo webcam problems. The order of these steps is crucial; we’ll proceed from the most common issues to the more complex ones.
1. The Driver Doctor: Updating or Reinstalling Webcam Drivers
This is usually the first and often the most effective solution. We will walk through the best methods for doing this:
- Method 1: Device Manager – The Built-In Troubleshooter:
- Press the Windows key + R, type
devmgmt.msc, and press Enter. This opens Device Manager. - Locate "Imaging devices" or "Cameras." Click the arrow to expand this category.
- Find your Lenovo webcam in the list. It is usually listed by its model name.
- Right-click on your webcam and select "Update driver."
- Choose "Search automatically for drivers." Windows will attempt to find and install the latest driver.
- If an update is found, follow the on-screen instructions to install it. Then, reboot your laptop.
- Press the Windows key + R, type
- Method 2: Device Manager – Manual Driver Manipulation:
- If the automatic update fails, go back to Device Manager.
- Right-click your webcam again and select "Update driver."
- This time, choose "Browse my computer for drivers."
- Select "Let me pick from a list of available drivers on my computer." This allows you to choose from previously installed drivers.
- If you have multiple drivers, try a different one. Then, reboot your laptop.
- Method 3: Lenovo Support Website – The Official Route:
- Go to the official Lenovo support website.
- Enter your Lenovo laptop's serial number or model number to find the correct drivers. You will find this information on the bottom or side of your laptop.
- Navigate to the "Drivers & Software" section.
- Find the webcam drivers and download the latest version.
- Run the downloaded installer and follow the prompts. This might require uninstalling old drivers first.
- Reboot your laptop.
2. Hardware Inspection: Physical Checks & Port Power
Hardware issues are less common, but they must be assessed:
- Check the Webcam's Physical Condition: If your webcam is external, examine the cable for any damage or kinks. Make sure the USB connector is securely plugged into your computer. For built-in webcams, there may be a physical privacy shutter on the top bezel of the screen. Make sure this is not activated.
- USB Port Power Test (If External): Try a different USB port. Some USB ports are powered differently.
- Power Cycle the Webcam: Unplug the webcam (if it's external), restart your computer, and then plug it back in.
3. Software Conflicts: App Permissions Investigation
Ensure no other applications are blocking the webcam:
- Close Conflicting Applications: Close all applications that might be using the webcam, such as video conferencing software (Zoom, Skype, Microsoft Teams), or programs that allow you to use the webcam.
- Check App Permissions (Windows 10/11):
- Go to Settings > Privacy > Camera.
- Ensure that the "Camera access for this device is on."
- Make sure the toggle switch for "Let apps access your camera" is also on.
- Scroll down and check which apps have permission to access your webcam. If an application you're trying to use is missing, enable access for that specific app.
4. Privacy Setting Examination: Safeguarding Access
Privacy settings may be preventing the webcam from working:
- Windows Privacy Settings Revisited: Repeat steps in the section above (Software Conflicts: App Permissions Investigation).
- Application-Specific Privacy Settings: Some applications have their own privacy settings. For example, in Zoom, you might need to check the video settings to ensure the correct webcam is selected and that the video is enabled.
5. BIOS Configuration: The Deeper Dive
This is rarely the problem, but it should be checked, especially if the other solutions do not work:
- Accessing the BIOS: Restart your laptop and repeatedly press the designated key to enter the BIOS setup (usually Del, F2, F12, or Esc). The specific key depends on your Lenovo model; refer to your laptop's manual.
- Navigating the BIOS: Use the arrow keys to navigate the BIOS menu. Look for settings related to "Integrated Peripherals," "Camera," or something similar.
- Enabling the Webcam: Ensure that the webcam is enabled in the BIOS settings. If it's disabled, enable it and save the changes. Reboot your laptop.
6. The Ultimate Reset: System Restore (Last Resort)
If all else fails, you may need to restore your system to a previous point in time:
- Creating a Restore Point (Recommended): Before attempting a system restore, it’s a good idea to create a new restore point. Search for "Create a restore point" in the Windows search bar. Click "Create" and follow the prompts. Name the restore point to remember it easily.
- Initiating System Restore: In the Windows search bar, type "System Restore" and select "Create a restore point."
- Click "System Restore" and follow the on-screen instructions.
- Choose a restore point from before your webcam problems began.
- Confirm your choice and begin the restore process.
- After the restore is complete, test your webcam.
7. Advanced Troubleshooting: Specific Lenovo Models and Unique Issues
Lenovo laptops are a diverse family. Here, we’ll consider model-specific issues.
- ThinkPad-Specific Considerations: ThinkPads often have dedicated webcam software and drivers. These might include settings for image adjustment, privacy controls, and integration with other enterprise features. Make sure the drivers and software are compatible with your specific ThinkPad model. Also, ThinkPads can sometimes have a physical camera “shutter.”
- Yoga-Series Challenges: Some Yoga models may have a unique driver integration for their webcam or a physical privacy shutter. Ensure all bundled apps are up-to-date.
- External Webcam Compatibility: If you are using an external Logitech webcam, it's a good idea to ensure compatibility with the Lenovo system. Go to the Logitech support website and download the latest driver.
- Webcam Firmware Issues: In rare cases, the webcam itself might have a firmware issue. Check the manufacturer's website for firmware updates. This is usually done directly through the webcam software.
Post-Fix Procedures: Maintaining Webcam Performance
Once your Lenovo webcam is working flawlessly, it’s crucial to proactively maintain its performance:
- Regular Driver Updates: Check for updated drivers periodically, especially after major Windows updates. Driver updates often contain performance improvements and bug fixes.
- Security Software Awareness: Ensure your security software isn’t interfering with webcam access. Occasionally, security software may mistakenly block the webcam, thinking it's a security risk.
- Privacy Best Practices: Always cover your webcam when it's not in use. This simple
